Prints
In the product selection, you can find a wide range of products including photo prints, fine art prints, passport photos, photo sets, and more. Here’s how to order these products in bulk.
Image selection
Once you have selected your product, a menu will open for you to add your images. You can upload images from your device or from an online source. To add more units of the same photo, tap the blue + button on the desired image. After selecting your images, press the green Upload images button at the bottom.

Product Configuration
Options will vary depending on the product selected for you to customise. For all products, you will be able to choose a Surface for your photo product and the Format. Additionally, when ordering Photo Prints or Photo Posters, you will be asked to choose:
Bleed Mode
Please note that for production reasons, we always produce with a 2 mm bleed all around. This means that a small part of your image will be trimmed off the edges. You can choose from the following options:
Standard mode (cropped): Your image will be cropped to fit the selected print size. If the aspect ratio of your image differs from that of the print, parts of your image may be cut off due to the new crop.
Individual mode (uncropped): The software will attempt to fit the entire image file onto the output format (minus a 2 mm bleed for production reasons). The longer side of the file determines how the image will be adjusted. For example, if you print a 2:3 image file on a 3:4 output format, white margins may appear at the top and bottom.
Frame
A white or black frame can be added around the image. The thickness of the frame can be adjusted freely using the slider. Note that this will not affect the final size of the photo product.
Bulk orders
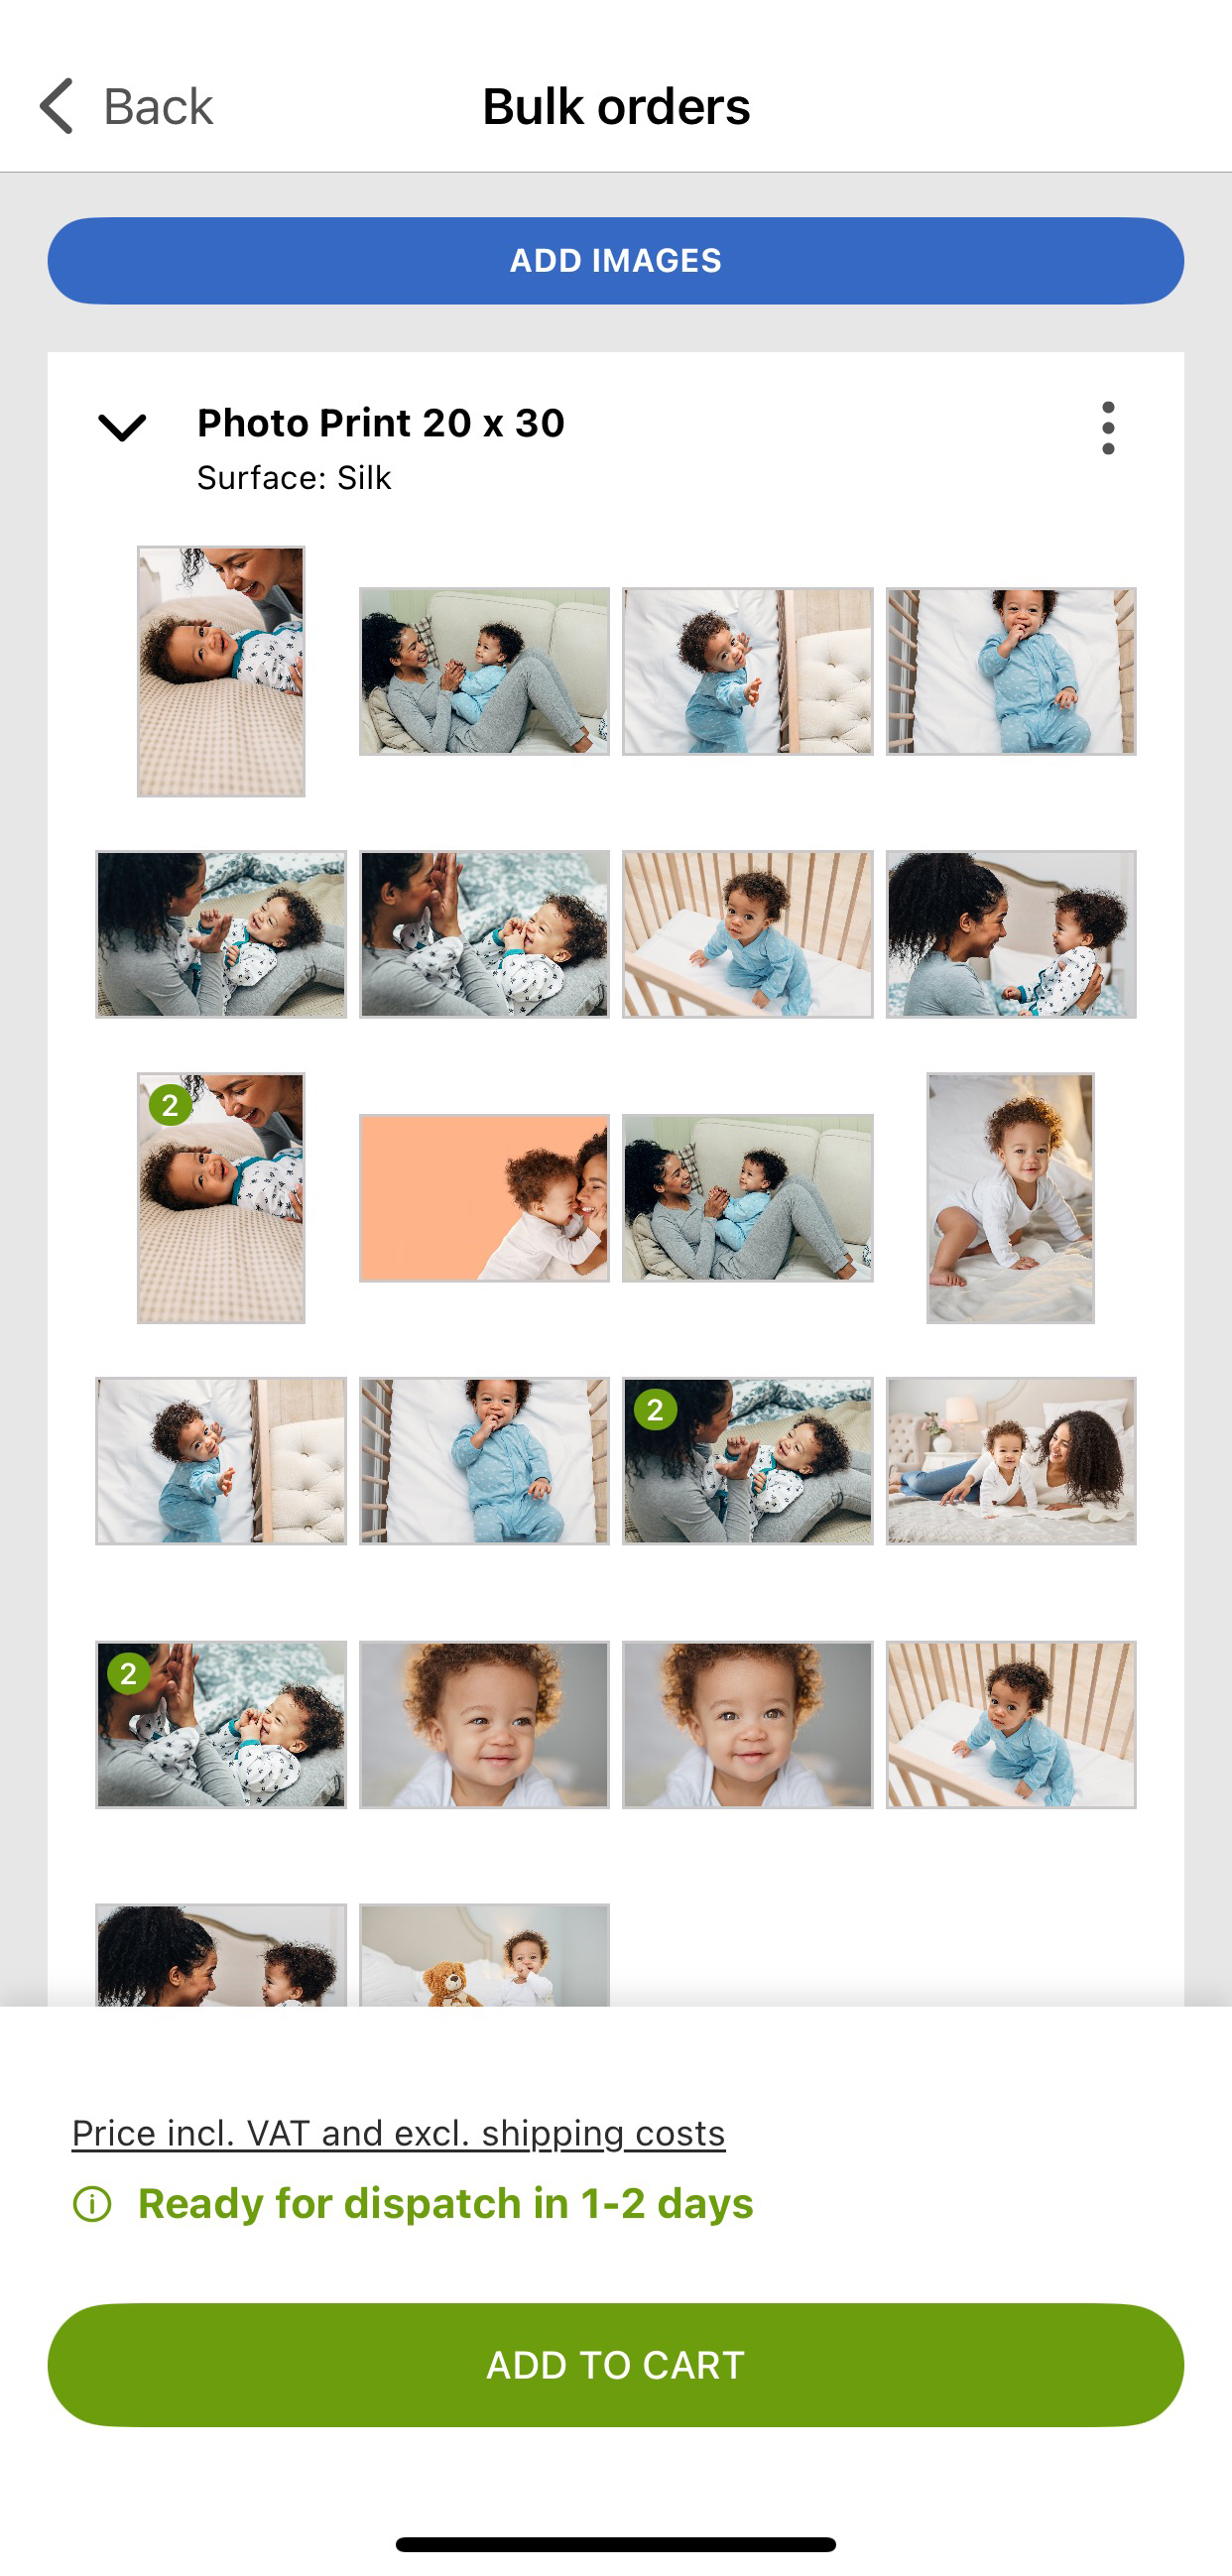
The Bulk Order menu will appear, displaying the previously selected images within the configured photo product. If more than one unit has been selected per image, the photo will be marked with the corresponding number in the top left corner.

To add more images, tap the Add images button at the top. You can then add more images with the same configuration or select a different photo product available for bulk order.
You can collapse the preview tab of the images by selecting the arrow in the top left corner of the product.
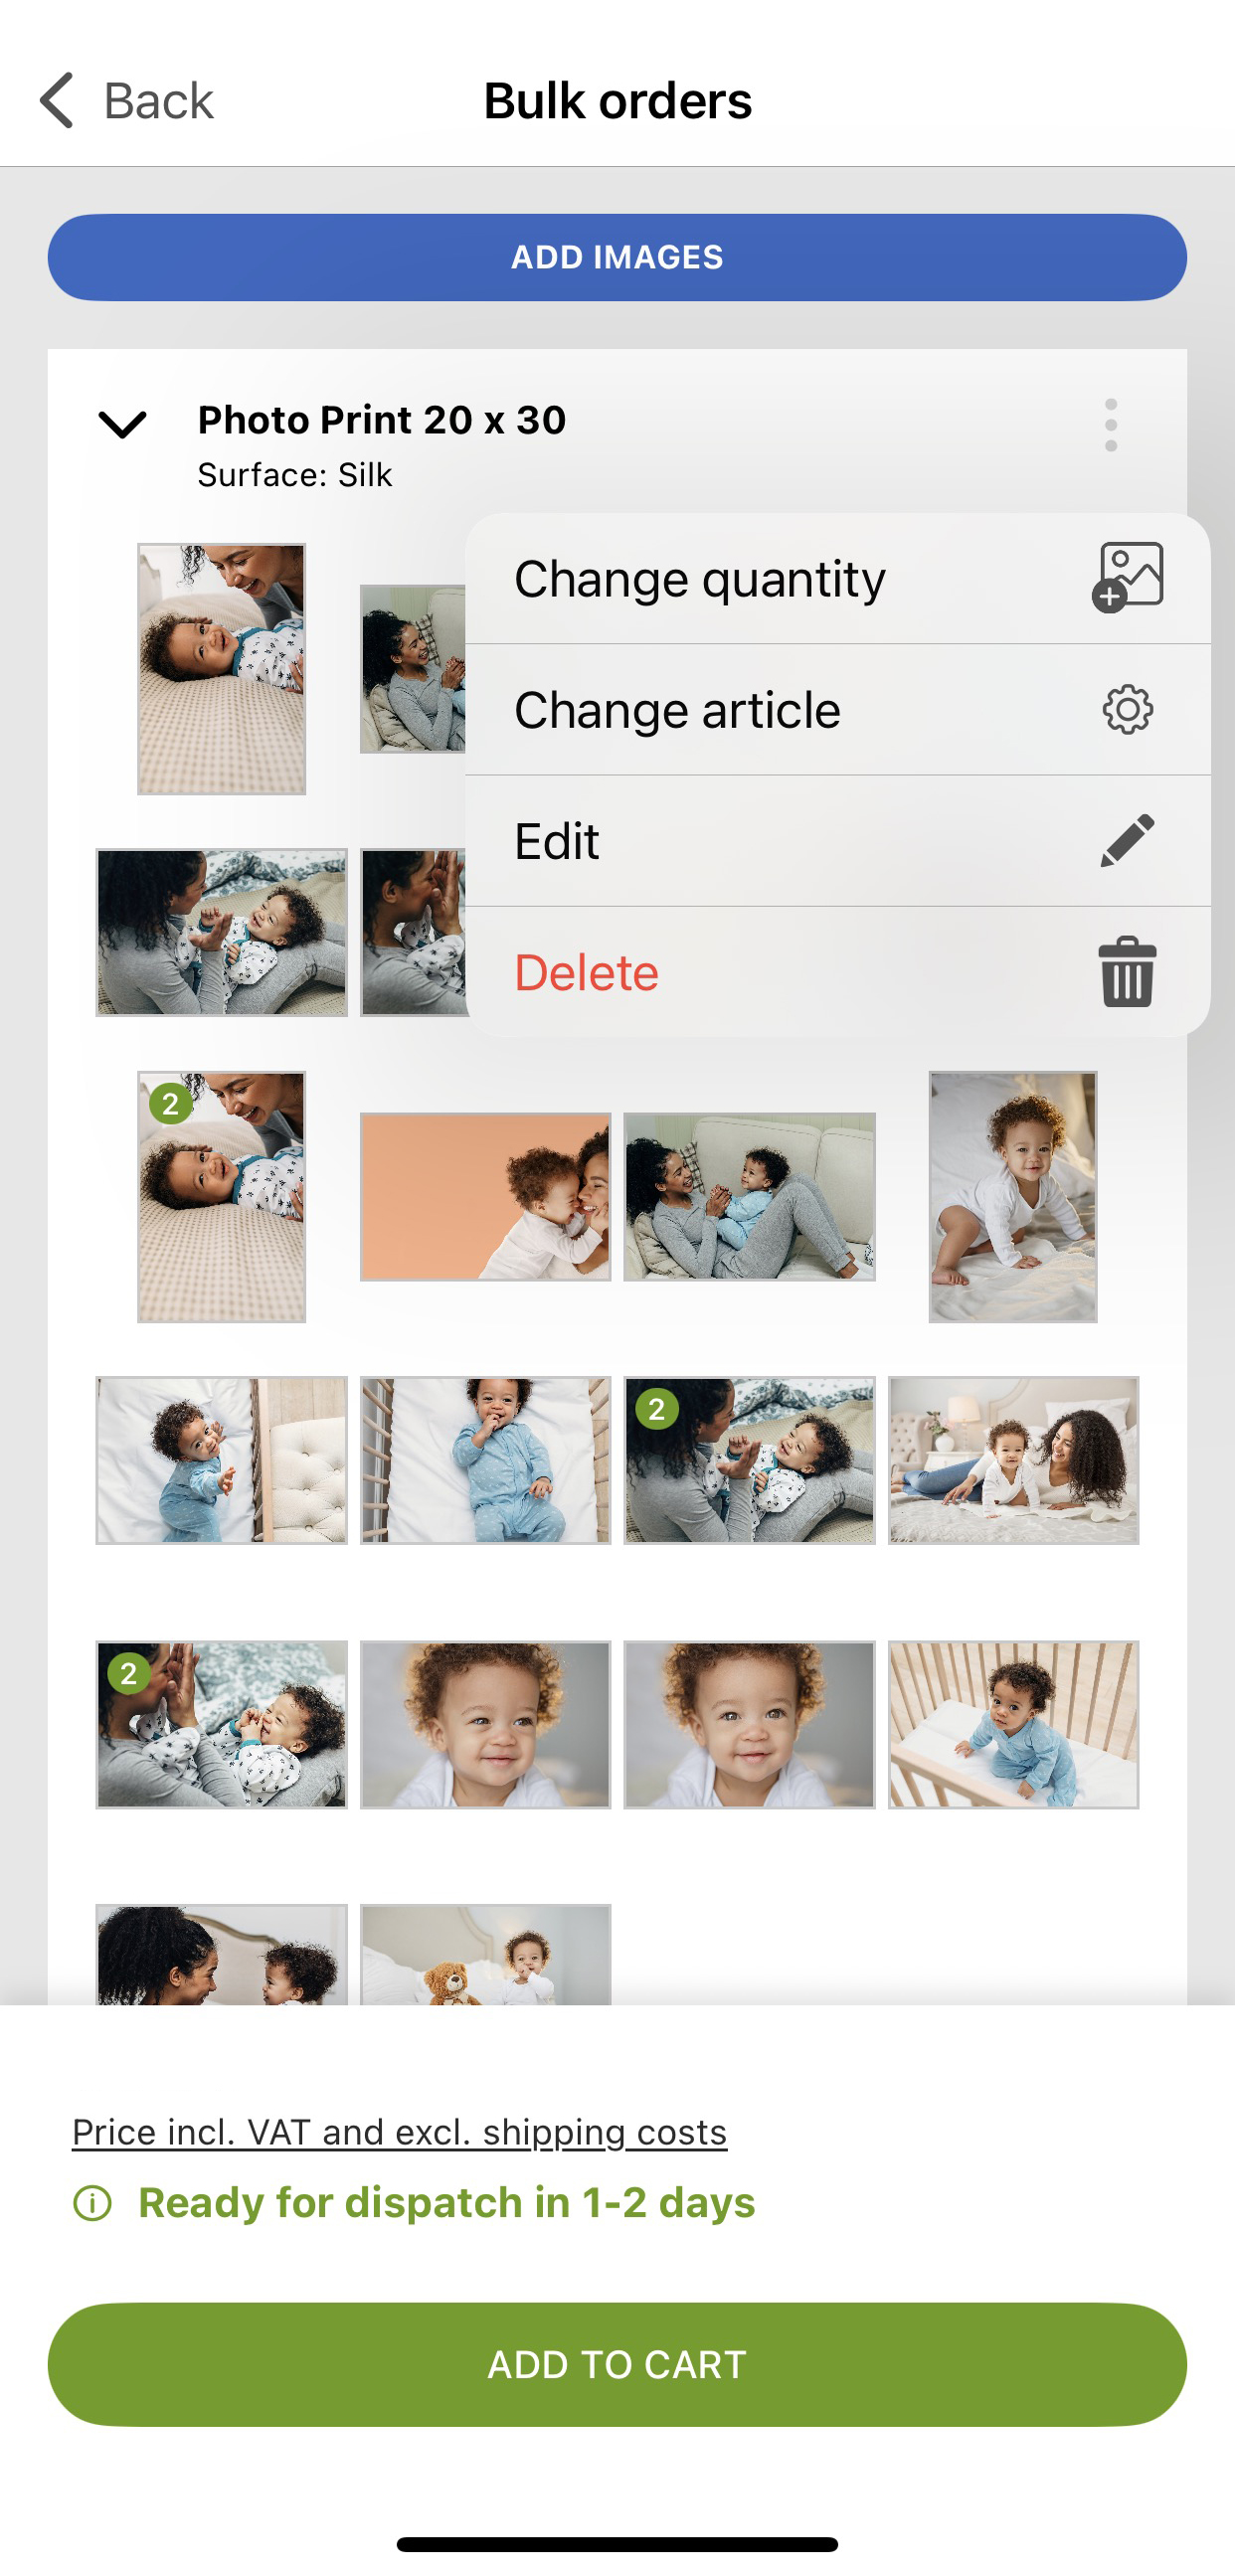
The configuration of the product and adjustments to the image can be made by tapping the three dots button in the top right corner. Tapping this button will reveal the following functions:

Change quantity: Opens a menu to adjust the quantity of each image. You can use the minus or plus icons or enter the number manually. Tap Complete button to apply.
Change article: Opens a menu to modify the configuration of the photo product, such as finish or format, or to switch to another available single image product. Tap Continue once you’ve made your selection.
Edit: Opens a menu where you can select the image you wish to adjust. This will open the Image Editor for further modifications. For more information read the Image article.
Delete: Deletes the photo product and all selected images from the Bulk Order menu.
Modify Individual or Multiple Images
It is possible to modify a single image from the previous selection or just a subset of images. To do this, select the desired images you want to modify. Once selected, additional tools will become available at the top:

Gear icon: Opens the Article Selection menu for you to choose a different product or configuration for the specific selected image.
Pencil icon: Opens the Image Editor for the specific image.
When you are finished, tap Add to cart.


